Tag Archives: diy

Idiot & Cheapskate’s Guide to Automating Your House (DIY SmartHome Hubs Controlled via Phone)

When I was a kid, I had this vision for my home that included automated everything — from lighting to blinds. Until last night, it was theoretical. Now I can turn off lamps from various rooms… from an Android or iPhone, even when I’m not in the house. It’s a start. And this morning when I got to work, I had the joy of toggling the lights from my phone to freak out WifeofNalts.

Let me warn you that we’re in an odd point of home-automation maturity. We’re moving beyond the era where it was reserved for the wealthy or techno elite. But it’s definitely not ready for prime time, and requires more patience and experimentation than I’d like… but such is the cost of being an early adopter, right?

My entry into “Smart Home Land” set me back only about $125: just $50 for a Wink hub (less if you buy it with add-ons) and about $75 for a bunch of GE Link lightbulbs (get the six pack). And I’ve got a plan for growing into additional functionality like remote monitors, appliance device on/off, security/alarms and broader control of lighting without doing the nightly sweep of 50 light switches. I can’t yet spring for the Nest, which is the connected thermostat that is the best-selling in its class. Honeywell and Lux fell asleep at the wheel.

Let me cut to wide shot and tell you about your options to entering “Smart Home Land.” Home automation was once reserved to the elite and wealthy, and required a special contractor and installation. Now you can pick up a hub and some $50-$150 add-ons and do-it-yourself quickly. I’m not going to get into the really nerdy hacks, but there are plenty of forums that can teach you to customize these beyond what the manufacturers specify or even offer.

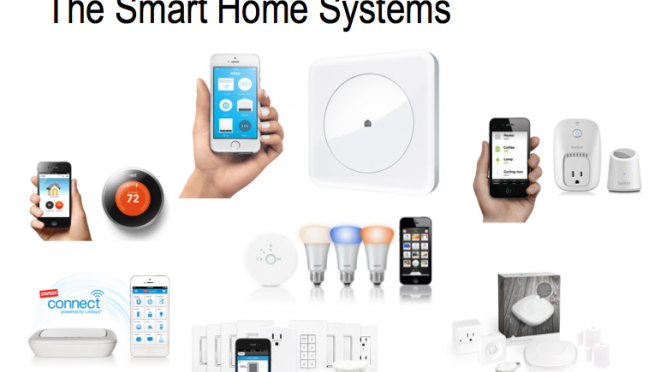
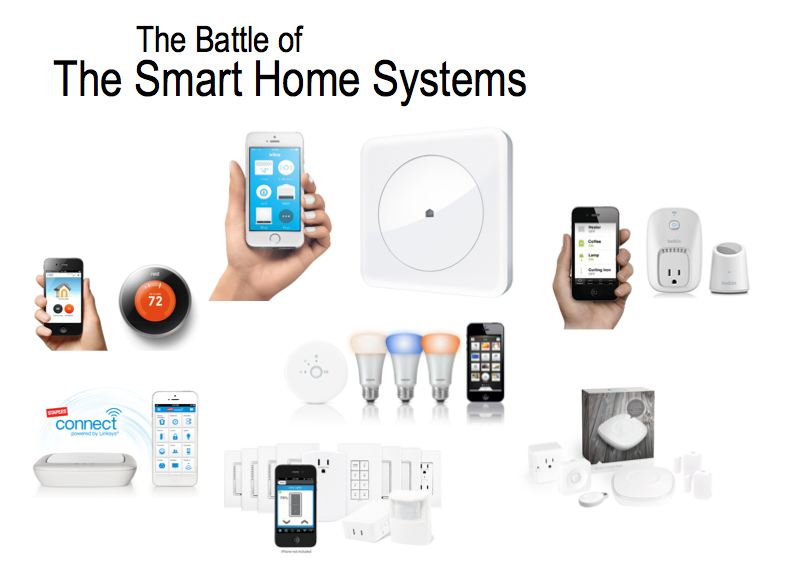
There are too many options and a shake-down is looming. There’s Belkin Wemo, Phillips Hue, Quirky Wink, GE Link, Staples Connect, Harmony, Insteon, Lutron, Revolv, Smart Things. Overwhelmed yet? Here’s a review of some of them if you want to get into the weeds.

Let’s cut to your basic entry options, and then I’ll tell you why I started with the cheap, flawed but Swiss Army Knife option called Wink… note that I’m favoring options that don’t require ugly remotes or special displays. We’ll use our iPhones and Androids, thank you very much.

Which smart-home system offers the best flexibility at the best price?
  1. Belkin has a Wemo switch that is a best-seller on Amazon and an easy place to dabble since it’s only $40. It uses your wifi and allows you to control any appliance via your Android/iPhone (just plug appliance into the Wemo, and the Wemo into your outlet. You can add on lots of additional options via Amazon or Home Depot. And if you’re all about lighting, you can get a Belkin Wemo starter kit for $85 that comes with a little hub and two lights… nice dorm room gift for that college techno kid. But I don’t see Wemo as a serious player.
  2. Then there are the lighting-specific solutions: Phillips answer to lighting customization: the Phillips Hue, which comes with a ton of different lighting options. The starter kit will set you back $188 and the individual lights get pretty expensive. Phillips Hue is generally cost-prohibitive except for those elite wealthy who might as well higher a contractor. But Home Depot has a decent spread of expensive lights so I imagine Phillips will be a formidable player. For those without excessive cash, the GE Links are better (you can also get these at Home Depot).
  3. There are a few other hubs that I didn’t look at closely. A cool-looking Revolv smart-home automation system (now part of Nest, the Google thermostat). Haven’t seen Revolv as a player yet. There’s Staples Connect (with Linksys), which is decent player and one that will likely survive the consolidation because Linksys and Staples are serious individual players. And the Smart Things Starter kit, which seems fairly comprehensive and has the best Amazon ratings… but is $300.
  4. And there are loads of home security devices, but I’m not writing about those.
  5. And the winner/wiener is… Wink hub despite some seriously negative reviews (including my own). Setup is torture (40 minutes of trial/error), but adding GE Link bulbs was as easy as screwing in bulbs and naming them. I can’t speak yet to the pain/joy of adding things beyond GE Link bulbs, but that alone made it worth the trivial entry cost of $50.


wink compatible products
Wink’s interface allows you to connect with a bunch of devices from other manufacturers

Wink is the buggy but poor-man’s Switzerland of all these home automation standards and devices. It has built-in support for Bluetooth LE, Wi-Fi, ZigBee, Z-Wave, Lutron ClearConnect, and Kidde. It also handles Phillips Hue (with some limitations) and works like a breeze with GE Link bulbs. I also like that Wink is a product of Quirky/GE, which gives inventors a chance to manufacturer ideas.

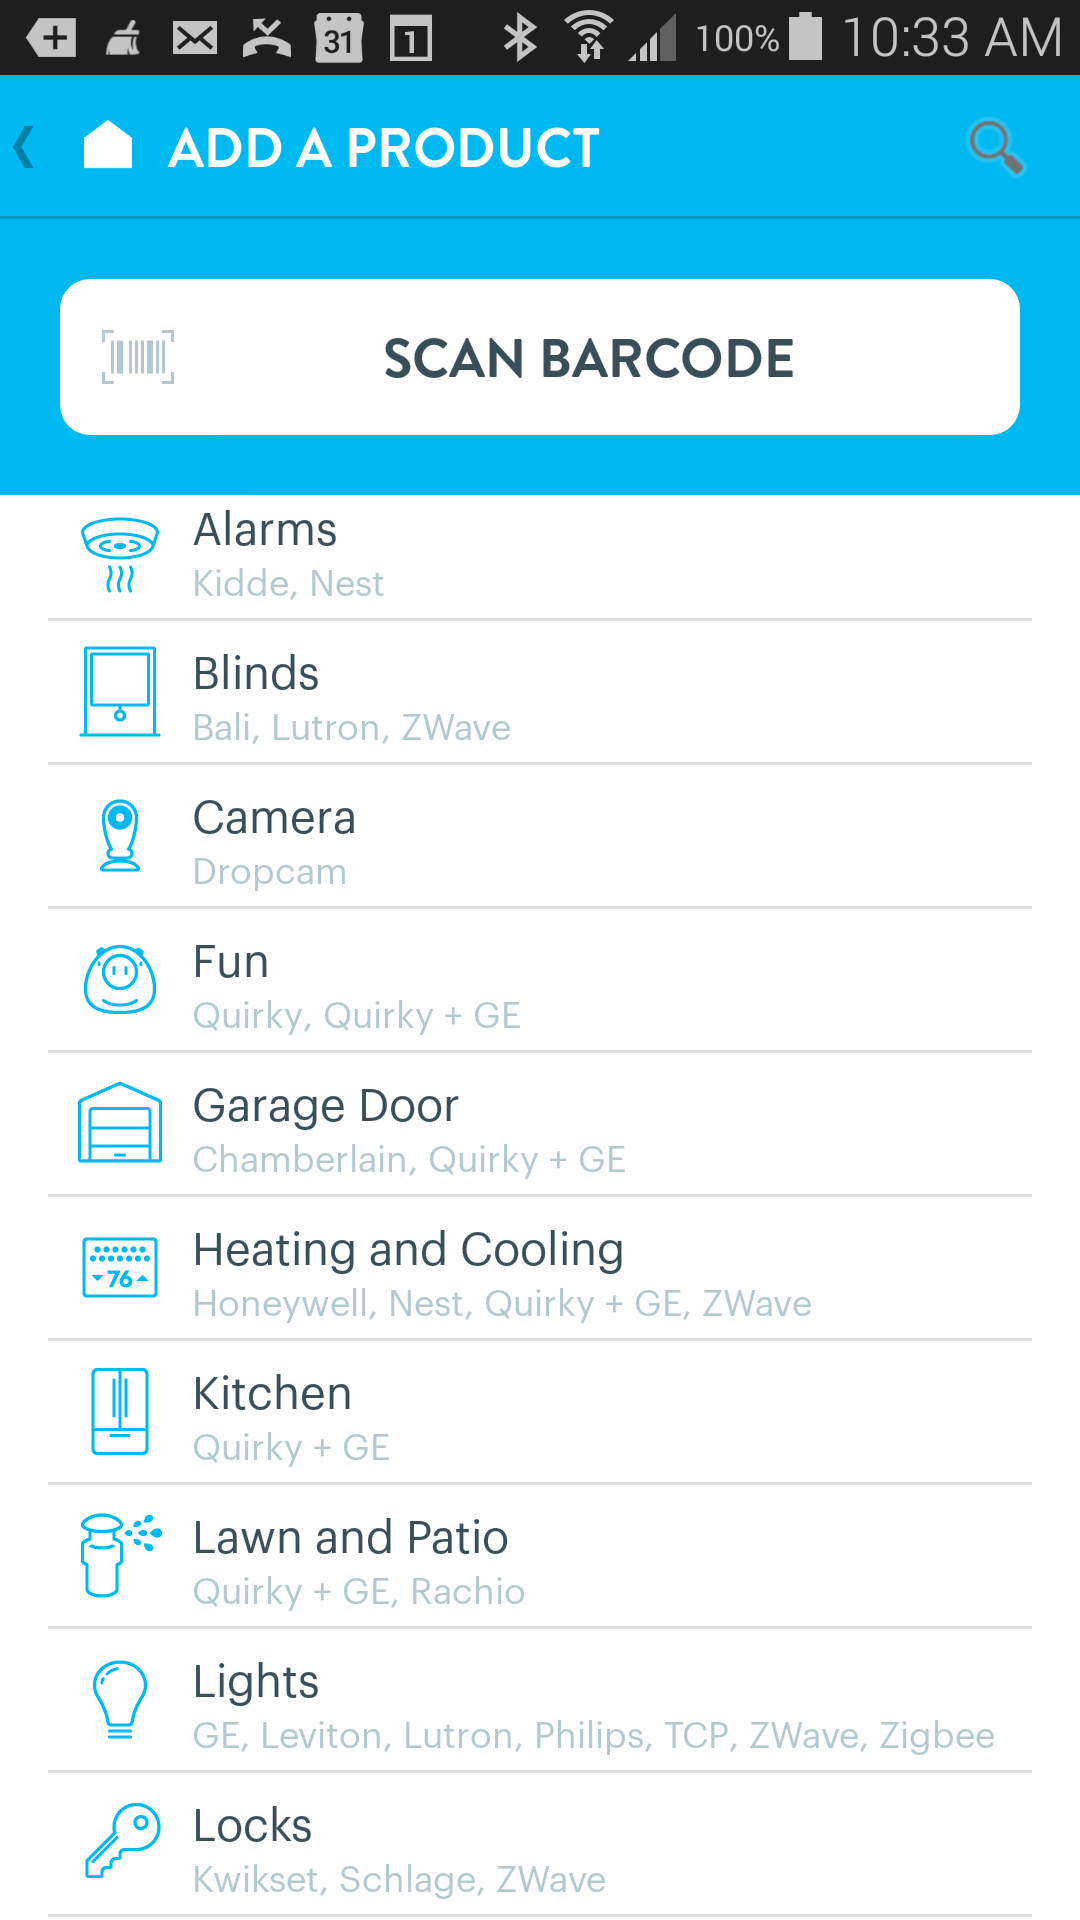
Once you have a hub and suffer through setup, you can add all kinds of things: alarms (Kidde/Nest), blinds (Bali/Lutron/ZWave), cameras (Dropcam), weird things from Quirky, garage doors (Chamberlain and Quirky/GE), heating and cooling (Honeywell, Nest, Zwave, Quirky/GE), lawn/patio, kitchen, door and window locks, and general appliances via a power plug that accommodates two different plugs that can be controlled separately (the other two are just plain extension plugs). Warning- that power plug got absolutely hosed on Amazon comments and it’s clearly flawed.

We’re still a few years before this stuff becomes more mainstream, but it’s nice that it’s become somewhat affordable and I like that you can experiment with different components to see what’s worthwhile.

Have you tried any of these? Would love your experience and “watch outs.”

Four Alternatives to Sonos Music: Stream Your Music to Speakers

connect phone to stereo system to play and stream music wifi bluetooth

So your phone is holding  your music collection and access to your online radio stations. And you have boom boxes, speakers and old amplifiers sitting around… depreciating. How do you connect them via Bluetooth or Wifi so you can stream your music in full sound?

Sonos sounds great, but aren't cheap. Especially if all you want is to activate your exiting stereo.
Sonos sounds great, but aren’t cheap. Especially if all you want is to activate your exiting stereo.

If you’re an audiophile with excess cash, the Sonos Play 1 is a $199 Wifi amplified speaker that is easy to use, sounds great, and fairly portable. I have one of them and the $299 Sonos Play 2 , and they come with an iPhone/Android app that allows me to stream Pandora or my saved music from my phone or laptop. SONOS does have a way you can connect to your existing speaker/amp, but it’s even more expensive than the one with the speaker (it’c called a SONOS connect). Note that you need one $44 SONOS bridge for to get started, and that Bose is also catching up with the Soundtouch.

So what if you don’t want to spring for a new amplified speaker? What if all you want is the ability to connect your phone to your existing stereo system? Here are four less expensive options.

  1. The real poor-man’s solution is my do-it-yourself speaker kit. But you’ll have to live with the frustrating range limits of Bluetooth. And some of the Wifi options are not that much more expensive.
  2. beep wifi speaker aluminum ashtrayAlternatively, you can wait for a Beep , which is a retro-looking metallic device that will connect your existing speakers to your digital music. Beep, created by some Google alumni, says it makes all your speakers wireless, but it doesn’t have an amplifier. But if you have good speakers without an amp, here’s an $18 amp that sounds like it should cost $100.  Beep is not available yet, but the pre-orders are $99. No shipping date announced on site (at least that I could find). Here’s a Cnet review.
  3. rocki speakerThe Rocki is very similar to the Beep, but also not yet available. Personally I like the Beep’s look better. To me the Rocki looks a bit cheap, although one critic says the Beep looks like an aluminum ashtray from bowling alleys, turned upside down. Touche.
  4. And here’s a clever Wifi audio hack. Buy a crappy tablet (like this iView Cyberpad at NewEgg)  and connect it to your existing stereo system via its headphone jack. This would also work if you have an old iPhone. But I don’t believe you can control it via your existing phone.

Here’s an article that also shows you how to stream tunes via an AppleTV or Miracast if you’re an Android user.

Bag Designer Uses Video To Teach Counterfeiters

Saddleback leather founder Dave Munson is using YouTube to teach counterfeiters how to knock off his bags. The video is instructional, persuasive,  sarcastic and funny. By showing how counterfeiters do and can save money (using lower quality leather, cheap stitching, inferior metal buckles), Saddleback manages to fortify its own high price point. The clip also communicates the company’s ethics and create a storybook villain out of faceless leather-bag counterfeiters.

saddleback youtube


Saddleback has only posted a few dozen videos to its YouTube channel in the past three years, but this “How To Knock Off a Bag” video has been traveling through social media sites (like Reddit) and will soon be its most-viewed.

The takeaway of the clip? If you’re considering making or buying a counterfeit bag, you’d better think not just about what you’ll get… but what it says about you.

My favorite quote (8 minutes in): “the hardware is where you can really make some money. What Saddleback uses is stainless steel 316. What you’re going to want to do is get some nickel plated stuff. So you can nickel plate plastic. You can nickel plate junk, pot medal. You can even nickel plate your crack pipe.”

Munson’s sometimes biting sarcasm is offset by his smile, enthusiasm for the quality of his leather, and a charming moment where he uses candy to lure kids into his plant… not for low-cost labor but for “take your children to work day.”

saddleback child labor

His advice to counterfeiters shows where they can cut corners that will make knockoffs look and feel great, even if they won’t last: “And you will end up saving more money than you will ever make with those gold fillings and jewelry that you get when you dig up those graves,” he says with a warm grin.

I’ve been a long-time fan of the company’s tagline: “They’ll fight over it when you’re dead.” And Dave uses more language and a non-salesy tone to build additional emotion around his craftwork — like the line “take this bag with you through life to hold all your memories.” May I add that this video has increased my longing for one of these Saddleback front pocket briefcase? It’s almost $600… so free to buy me one, mom or rich viewer.

And an added plus? In the coming months, what do you think people will find when they search counterfeit Saddleback? Maybe a video that makes them second guess their pursuit?

Poor Man’s SONOS: How To Make a Badass Bluetooth Audio System from Amo Box and Old Radio Shack Speakers

My badass, poor-man's semi-portable bluetooth amplified speaker system
My badass, poor-man’s semi-portable bluetooth amplified speaker system has sound that compares to the Sonos system.

Who needs the fancy Bose Soundlink Mini Bluetooth wireless rechargeable speakers? Or your fancy SONOS systems?

Here’s my morning project… a do-it-yourself semi-portable amplified Bluetooth speaker system made out of my grandfather’s amo box. If you already have a pair of decent speakers, this system will set you back exactly $44.84 and give you sound that competes with a $300 SONOS (although the Sonos software is really cool and Wifi range is much better than 20-25 feet of Bluetooth).

If you don’t have the fortitude for this, here’s the link to buy the Sonos for the best price I could find online ($199 on Amazon).

Parts include:

  1. A pair of speakers. I used a pair of Radio Shack Minimus 7 speakers. They don’t make them like this anymore, kids. Before there were websites, the audio mags used to rate these as the best. Again- you can bring whatever nice speakers you already have.
  2. A Bluetooth receiverBelkin F8Z492TTP Bluetooth Music Receiver (1K plus four star rating on Amazon, and can’t beat the $24.99 price). *** Update- the Homespot NFC Bluetooth is $27.99 and worth the extra $3 because the range is better and it beeps when it’s paired. According to Amazon reviewers, it sounds better too.
  3. An amplifier. You probably already have one, but I LOVE the sound of this puppy and it’s dirt cheap: “Lepai” LP-2020A Tripath Class-T Hi-Fi Audio Mini Amplifier with Power Supply (awesome sound for $16.85, and we’re talking 1,500 almost 5-star ratings). I think this is the best tech bargain I’ve seen in my life.
  4. Accessories: The bluetooth receiver and amplifier come with power cords and audio connectors. So all you need is some speaker wire, glue, and an extension cord.

Wish you could hear it. It’s pretty bold. Nice whoop-ass Redneck acoustical system for the pool or home. Another update Jan. 11, 2014: I just cranked it and asked a buddy and his kids to close their eyes. They picked this rig over the Sonos playing the exact same song!

The instructions are simple and, of course, you don’t need the amo box. But it’s nice if you want to move it around.

  1. Plug the speakers into the Lepai amp speaker inputs. Plug the Lepai amp in the wall. You can handle that, right?
  2. Plug the Homespot (or Belkin) Bluetooth receiver into the amplifier photo/audio input. Plug the power in the wall.
  3. Get your iPhone, iPod or laptop and “find” the Homespot or Belkin, then pair them.
  4. Turn on the sound of your device (no special app required) and it comes booming out the speakers like audible love!

Let me know if it works for ya? I can’t believe more people don’t do this!

10 Creative Budget DIY Production Effects, Tips & Tricks

How can we provide film-like effects and special effects using modestly priced gear? For instance:

    • What are the best ways to shoot video using a digital SLR camera, and make it look like cinema film?
    • What $2 item in your kitchen provides a perfect way to keep your camera still in a car?
    • How can a pet’s home let you shoot underwater, using your existing camera without an expensive add-on?
    • When can a painter’s tool get you a crane/jib shot?
    • How can you make a person vanish or defy gravity by crawling on a wall?
    • What’s the easiest way to clone yourself in a video?
Keep your hard-earned money, and try some of these free or low-budget hacks, tricks and effects

Today we’ll look at some of these do-it-yourself (DIY) poor-man techniques, and see example videos are provided (most links advance to the effect’s precise moment in the video to save you time). Tomorrow I’ll provide a collection of 10 free websites and tutorials about creating a film/cinematic look using a fairly inexpensive digital camera.

But first… a quick tip on selecting a killer $500-$1000 videocamera that will produce footage you could barely get from a $5,000 to $10,000 just years ago. The solution for film-like quality in your videos is a cost-effective ($500-$1000) HDSLR video camera. Click here to see three pro ~$1000 compared (Sony vs Panasonic vs Canon).

Your HD-SLR can give you near-film quality with some of these tips.

Many YouTubers and quasi-professional video creators are using traditional SLR cameras as their primary videocamera. Sxephil, for instance, was using a Canon 5D when he showed how he establishes his home studio. Now that the video quality rivals many high-end video cameras, we’re able to enjoy the beautiful effect that decent SLR lenses provide — like that depth-of-field look you see in WheezyWaiter and MysteryGuitarMan videos. Let’s call these HDSLRs.

With help from a variety of sources (Videomaker, Amazon, B&H, PCMag, Cnet and the cameras used by top YouTubers) I’ve compiled some of the winners on this Amazon videocamera store, and it’s an affiliate program that makes me almost nothing except when stalkerofnalts told me he was buying expensive new gear, and let me generate Amazon affiliate links for his products). At least I can provide people with this link when they ask for my advice.

Now back to the poor-man effects. There’s a lot more to professional-looking video than a decent camera, and some of the most important factors are lighting, camera movements, audio and a really good lense. That being said, the latest issue of Videomaker (Sept. 2011) has an article by Kyle Cassidy titled “Home Grown Video Gear.” The same author wrote a nice piece last year titled “Making Your Video Look More Like Film.” The top-three tips are thanks to Kyle.

Now the Top-10 Creative Budget DIY (do it yourself) Production Tips and Tricks to Create Film-Like Special Effects

A bag of rice makes a nice car tripod

1. Very Steady Car Tripod Using Bag of Rice: I do a lot of video vlogs, and I find a bunched-up shirt works as well as any fancy device. It keeps the camera from sliding and falling over, and it’s also easy to adjust (just scrunch more shirt under the front to tilt the camera up). Kyle’s technique is even better. A bag of rice! Isn’t that brilliant? It’s easy to adjust, can work well on the window to keep your camera steady on a zoom, and it might even buffer some of the shake from the car.

Brilliant. A fish tank as underwater camera case.

2. Underwater Housing With Partially-Immersed Fish Tank: Turn your existing camera into an underwater one without the fancy, cost-prohibitive custom-housings. Simply use a small fish tank that’s partially immersed in the water. Now you’ve got the ability to adjust the camera (focus, zoom, turn on and off) and it stays dry. Brilliant! Kyle suggests covering it with a towel to avoid flashes, and I’d recommend putting it on top of something like that rice bag below it. Then if a careless move causes the tank to go under, you’ve got the camera away before the tank fills.

3. Jib or Crane Shot Using Telescoping Painter’s Pole. I’ve used a pool net to produce a camera-in-sky and sweeping horizontal “crane” effect (see a 5-year-old flying Charlie in Super Baby). Brushing the camera above and through branches provides a breezy feel. I also mounted the video camera on a flag pole for Google Maps Butt crack (approaching 1 million views). I even attached a Flipcam to a bunch of helium balloons (see video, and behind-the-scenes). This would have been a lot easier once I purchased my super-light car-key hidden camera, but the quality is rather poor. But Kyle suggests a telescoping painter’s pole, which range from $5 to $90 for a telescoping one (see Home Depot). I just picked up this inexpensive telescoping pole from Amazon for $20 and change (free shipping since I’m on Prime). While on a motorcycle, we got some nice footage using a tripod as a crane.

The web is packed with homemade dolly devices. Smooth is key.

4. Hello, Do-It-Yourself Dolly: A gently moving horizontal-slide of a camera (slider, dolly) can create a powerful effect (see example), especially when there are objects near and far to show perspective. While drooling over the $800 Cinevate Atlas 10 FLT, I went about searching for homemade Dolly tracks. I once bought a steadicam that worked pretty well, and was constructed with weights and plumbing equipment. Courtesy of LifeHacker, I found a guy with a how-to video on Veoh where J.G. Pasterjack created a dolly with skateboard wheels, and it can run on a flat surface or along a 2-by-4 board. Knowing I’d burn too much time and probably screw it up, I asked to be on his waiting list. He’s since created MoveYourCameraCheap.com, and is having trouble keeping up with demand on eBay.

5. Disappear or Defy Gravity With Wall-Decorated Floor: Your floor makes a good wall, can give the effect that people, objects or pets are climbing on the wall. See “lovey” the kitten crawling up a door, which was laid on the ground. This 2006 “Gravity Wall” video with my kids is a bit more obvious. To disappear, a) mount a camera perfectly still on a tripod or surface, b) simply shoot the background/setting alone and be sure lighting doesn’t change noticeably, c) videotape yourself (or person/object you wish to vanish), then d) use a “dissolve” effect when editing between the two clips (which diminishes subtle changes in the video). For instance, I provided a shock ending that made it look like a garbage truck ran over me inside a garbage can — seen in this fairly popolar “Garbage Can Prank” video.  I used it in one of my first kid videos (Katie turned invisible in this video shot maybe 5 years ago and uploaded in April) and more recently in this Dr. Who sponsored video, with some added glow via Iggy35.

A poster or inexpensive table cloth works as a green screen

6. Poor-Man’s Green Screen: Green screen allows you to replace a plain green background with a video or photo of your choosing. There are two ways to create a cheap green screen. First, you can use green posters or a dollar-store plastic table cloth. Second, you can use a painted wall that’s close to green. Most video-editing software with “green screen” functionality can “knock out” a background even if it’s not pure green. You just want to: a) ensure that you’re not wearing any colors that are close, b) light the wall separately to avoid shadows, and c) avoid wrinkles or seams that will invariably catch shadows. I have a cloth green screen, but that’s because I use green-screen to make it appear that I fall down steps. Cloth is critical to that effect.

7. Clone Yourself With Matte Effect: The Matte effect, where you overlay a portion of one video over another, is somewhat painstaking. But it can give you the ability to hire the cheapest support cast you’ll find: yourself. Here I cloned myself by shooting two scenes of myself and overlaying the clean Nalts over a video of my clone surfacing from mud. It’s something that requires a higher-end editing tool like Final Cut Express… but worth it.

8. Get Nutty and Grosse: If you’re not inclined to use special-effect software, here are some how-to homemade special effects that require little knowledge or effort (MightyCouch). The knife-tossing how-to is especially good, and you can even simulate the knife landing precariously by tying it into a string and pulling it away… then playing that clip backwards. Here’s a how-to video that shows more gory special effect tricks, including a bloody explosion using a condom full of fake blood.

9. Sundry Techniques for Leveling Camera, Hiding Wires & Creating Soft Effect: Kipkay is a prolific video creator that shares many of his production tricks and hacks, and this rapid fire “volume one” video is loaded with clever Magiver-like techniques. KipKay’s second Howcast video provides some less sexy but handy tips — such as using bread clips to mark cables.

10. Set your HDSLR to Resemble Film: Lastly and most importantly, there are a load of ways to get your HDSLR to give you a film-like quality… there’s even a book devoted to the subject (DSLR Cinema), which is on my wishlist. I’ve embedded a fantastic instructional video by Drumat5280 who has other videos like “DSLR settings.” He jokes that he’s an expert because he and his wife watch videos weekly. The important items include avoiding zoom, setting your camera to highest resolution (1080i) or higher, mic carefully, and set camera to 24 frames per second (which creates the film look and smaller file size). He encourages you to use a “shallow depth of field” which encourages viewer to focus on that which your camera focuses.  VideoUniversity has a nice piece on little nuggets like avoiding auto-white balance and any setting that is called an “enhancement” (which is almost as bad as the cursed “digital zooms,” which pixelate the video by cropping only a portion of the screen). And Techwaffle has a how-to video that shows you how to auto-focus and use your computer to control your camera (at least with the Canon 5D).

What’d a miss? Any tips you’ve learned and are willing to share? Even little things help — like how to use a laptop as a tele-prompt (something discussed in the valuable Videomaker forum). Finally, I’d be remiss not to mention Film Riot, a Revision3 show that is loaded with amateur-ready tips that produce very cool and otherwise-costly effects. Check it out.

Make Your Own CNN News: Nancy Grace Competition?

Looking for a DIY (do it yourself) news site to show TSA (transportation security administration) “pat downs” that are TMI (two much information)? Well put down your acronyms, and get out your cameras…

I’m not sure how long this has been around, but I find this consumer-generate “breaking news” site interesting. CNN has a consumer-generated news section.

fake cnn news girls box nancy grace
Move over, Nancy Grace. CNN has "make your own news" website. Live executions coming soon?

People are uploading photos of car wrecks, notes for missing children, and (most importantly) videos about the latest TSA agent who looked at them funny (Parenthetically I saw a guy snapping a photo of his mom getting a perfectly appropriate TSA pat-down, and he was politely told to put the camera away… there’s some saucy Nancy-Grace like news).

  • The bad news: the “most viewed” videos or photos have been seen only a dozen times or so. It’s not popular, and akin to setting up your own VHS camera and showing your homemade “news report” to your friends.
  • The good news: it has a high perceptual value of importance and credibility despite the “not vetted by CNN news” disclaimer. It’s on CNN.com and listed as “breaking news.” So if it was produced well… it would be hard for someone to internalize the disclaimer.

How long before people start packaging up fake “product reviews” and using CNN to distribute them? I gather someone at CNN has the sad task of seeking and killing spam, but it seems like a spammer or infomercial’s playground… or at least a few Nancy Grace impersonators. I wonder if CNN would pull the content if someone took the “Nancy Grace model” just one step further and actually performed a live execution of the victim of the news report. Or at least a lynch mob.

Give Your Video a Film Look (How-To Video)

beach bypass and film look on videoWhat’s the difference between a CharlesTrippy and MrSafety video and the rest of us? They use good lighting, and adjust the video for that film look. Both are very willing to share their tips, so I’ll post them soon. In the meantime, YouTube is a treasure trove for “how to” (DIY) videos on using advanced effects. I use Mac’s iMovie, which is extremely limited but I’m too lazy to learn something more complex. For several years, I’ve had Final Cut Express (a simpler version of the Final Cut Pro that professionals use) but rarely use it except green screen or split screen.

Today I experimented with applying a “beach bypass” look that gives your video that tinsel look of film. Here’s a beach bypass “how to” video for Final Cut Express. Here’s another for Final Cut Pro for those of you that are rich or steal software. These may work for other PC-based editing as well, since it’s simply overlaying two layers — one with low saturation and the other with high contrast.

As the medium matures, more of the top creators (CollegeHumor) are stepping up their cinematography. I won’t soon be posting 2-minute short films, but I am trying to make my crappy web videos a bit more like TV/film. As the audience grows past us “early adopters,” the mainstreamers and laggards will seek out content that looks more like what they’re accustomed to watching.

Wonder Why How-To Videos Boom Despite Economy?

how-to video siteWhen PR Pro Laura Hart (Beck Media & Marketing) contacted me in early August about how-to video site “Wonder How To,” she suggested a WVFF blog post on top video sites, and told me her client’s website had 145,000 videos. I was impressed with her pitch (she had bothered to read the blog), and promised to write about the category again and WonderHowTo. When I preditably forgot, and she reminded me gently a month later — only she had to update her stats. The site now has more than 200,000 videos.

It’s no surprise that how-to websites are booming and video makers are creating more instructional (do it yourself- DIY) videos. In a tough economy, we’ll be outsourcing less and relying on our own lack of competency. Just as we’ve grown accustomed to Googling answers, we’re now surfing video to learn new tricks, software tools, and hobbies. Or maybe we just want to learn how to smash a bottom of a beer bottle.

Most importantly, DIY is mostly evergreen content. Years from now we’ll still want to build a hover board from scratch (see “hot” section for more like it). There are a number of how-to sites, and much of WonderHowTo’s content is right from YouTube or Metacafe. But it’s well indexed around an important application for video, and it’s frankly hard to find DIY video via YouTube and even Google.

Other how-to websites include HowCast, Graspr and Life 123 and 5 minutes. I haven’t reviewed them all because I haven’t decided to plunge into the maybe-more-profitable-but-less-exciting DIY space. But if I were to start these, here’s what I’d do:

  1. Hedge your bets, and post everywhere. Use TubeMogul and be sure to market your content via sites (like WonderHowTo) that may not require you to host it there, but would list your video.
  2. Keep it short. Nobody has ever said “that instructional video went too quickly.” Chapter it if necessary, and provide places for people to pause.
  3. For the love of God keep it simple. No expensive production necessary.
  4. Focus on topics that are unique- the space is already crowded with obvious things like home repairs and software… find something in which you’re uniquely qualified to teach.
  5. Want to really set yourself apart? Entertain! It has worked for most popular chefs.
  6. Don’t stop by posting on these sites. Find blogs around your topic area and let them know the videos exist. Preferably lead them to sites that share revenue.
  7. Sell yourself. Have a simple website that credentializes you as an expert- and even better have a book even if it’s a self-published short one.

P.S. Here’s a recently featured how-to video: How to get into any pub by pretending you’re a disk jockey.