Tag Archives: audio

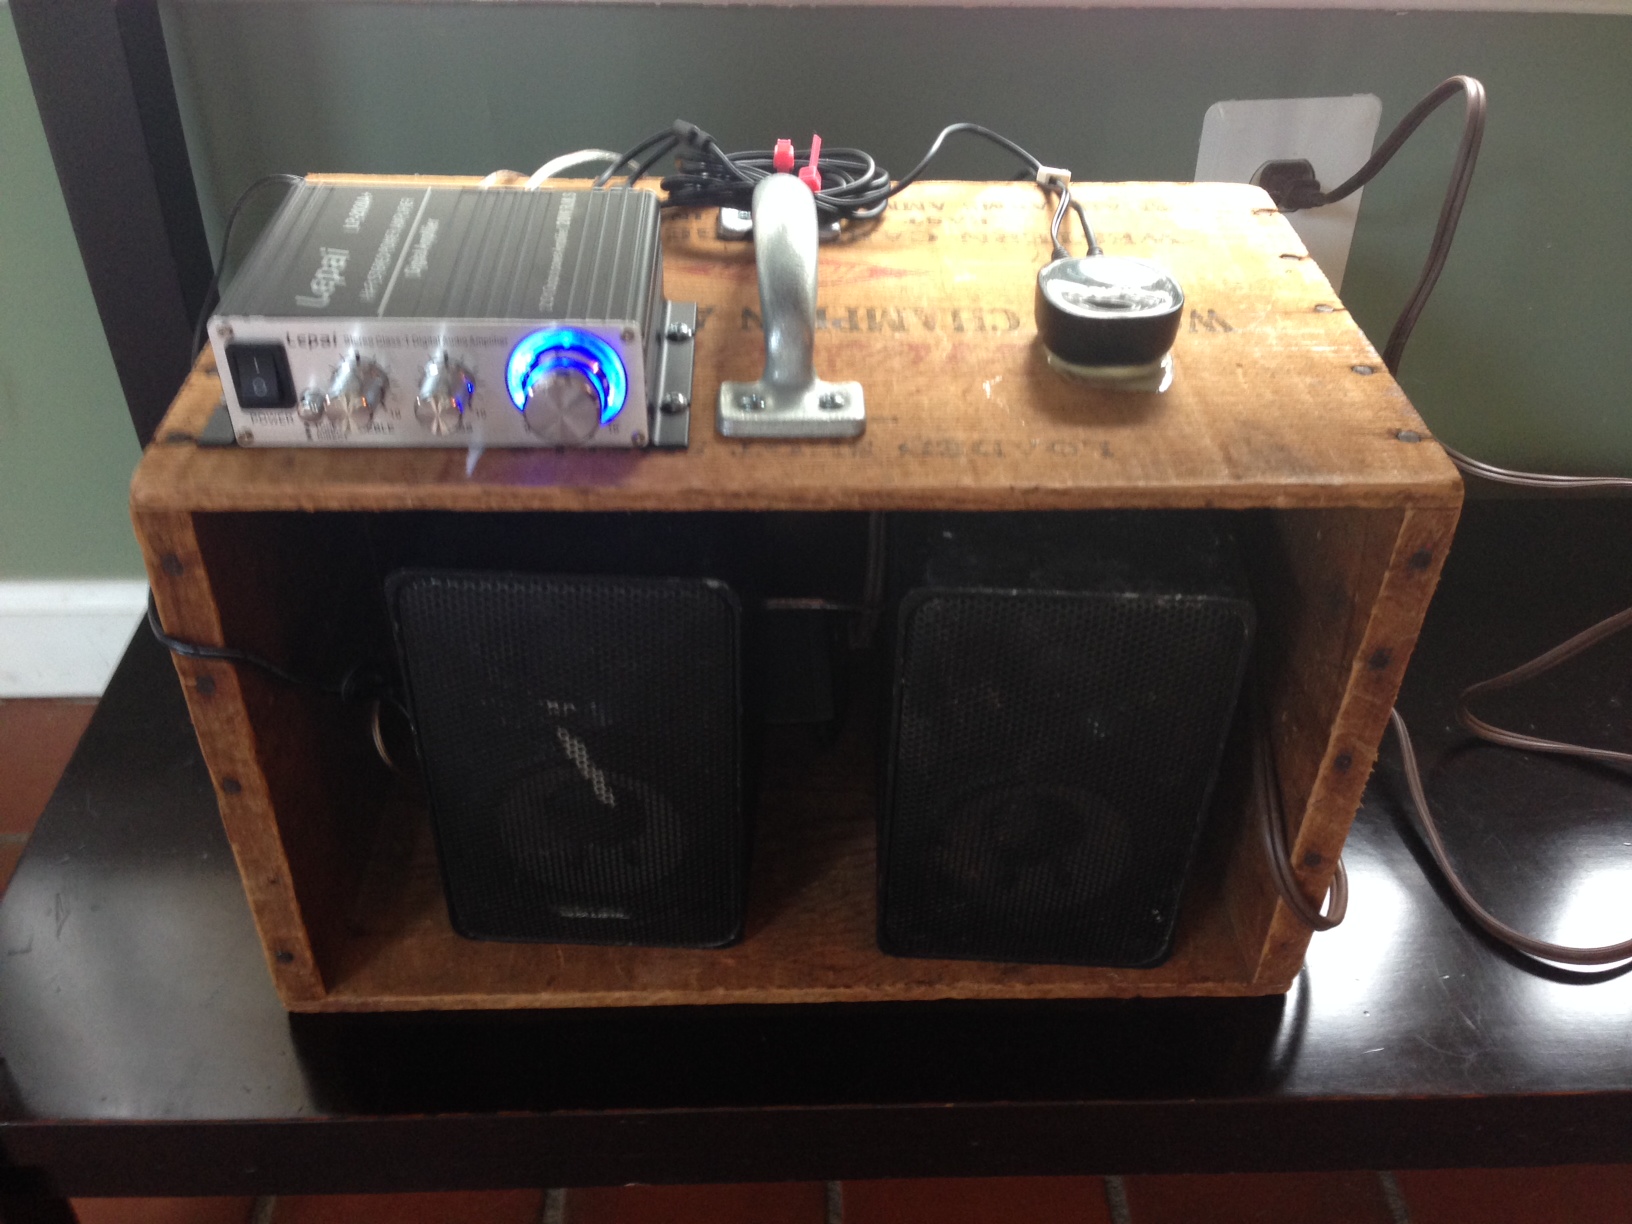
Poor Man’s SONOS: How To Make a Badass Bluetooth Audio System from Amo Box and Old Radio Shack Speakers

My badass, poor-man's semi-portable bluetooth amplified speaker system
My badass, poor-man’s semi-portable bluetooth amplified speaker system has sound that compares to the Sonos system.

Who needs the fancy Bose Soundlink Mini Bluetooth wireless rechargeable speakers? Or your fancy SONOS systems?

Here’s my morning project… a do-it-yourself semi-portable amplified Bluetooth speaker system made out of my grandfather’s amo box. If you already have a pair of decent speakers, this system will set you back exactly $44.84 and give you sound that competes with a $300 SONOS (although the Sonos software is really cool and Wifi range is much better than 20-25 feet of Bluetooth).

If you don’t have the fortitude for this, here’s the link to buy the Sonos for the best price I could find online ($199 on Amazon).

Parts include:

  1. A pair of speakers. I used a pair of Radio Shack Minimus 7 speakers. They don’t make them like this anymore, kids. Before there were websites, the audio mags used to rate these as the best. Again- you can bring whatever nice speakers you already have.
  2. A Bluetooth receiverBelkin F8Z492TTP Bluetooth Music Receiver (1K plus four star rating on Amazon, and can’t beat the $24.99 price). *** Update- the Homespot NFC Bluetooth is $27.99 and worth the extra $3 because the range is better and it beeps when it’s paired. According to Amazon reviewers, it sounds better too.
  3. An amplifier. You probably already have one, but I LOVE the sound of this puppy and it’s dirt cheap: “Lepai” LP-2020A Tripath Class-T Hi-Fi Audio Mini Amplifier with Power Supply (awesome sound for $16.85, and we’re talking 1,500 almost 5-star ratings). I think this is the best tech bargain I’ve seen in my life.
  4. Accessories: The bluetooth receiver and amplifier come with power cords and audio connectors. So all you need is some speaker wire, glue, and an extension cord.

Wish you could hear it. It’s pretty bold. Nice whoop-ass Redneck acoustical system for the pool or home. Another update Jan. 11, 2014: I just cranked it and asked a buddy and his kids to close their eyes. They picked this rig over the Sonos playing the exact same song!

The instructions are simple and, of course, you don’t need the amo box. But it’s nice if you want to move it around.

  1. Plug the speakers into the Lepai amp speaker inputs. Plug the Lepai amp in the wall. You can handle that, right?
  2. Plug the Homespot (or Belkin) Bluetooth receiver into the amplifier photo/audio input. Plug the power in the wall.
  3. Get your iPhone, iPod or laptop and “find” the Homespot or Belkin, then pair them.
  4. Turn on the sound of your device (no special app required) and it comes booming out the speakers like audible love!

Let me know if it works for ya? I can’t believe more people don’t do this!

The Golden Girls Election 2008 Parody Video

What if each of the Golden Girls was played by one of the candidates. It’s worth exploring that through this hysterical video (found via Barely-Political.com’s blog, which called it the “funniest political video ever”).

See these sweet little old ladies with real audio overdubs by McCain, Bush, Clinton, Palin and Obama.


Google Helped Me Find Myself

There I was. Frustrated this morning after forgetting how I converted some of my old Windows Movie files (from the 1990s) into to something I could edit in Mac iMovie and post to YouTube. I’m running through various options, experimenting with various free software, and running into brick walls. Hours pass.

Then I had this crazy last-resort idea (it’s too early to call CharlesTrippy).

I’d Google search “how to demux .mov on mac.” There on the first page was a nice post from a blog. The author had figured it out, and explained it patiently to me.

Turns out, though, t was my friggin’ post. On my blog. From last December.

Who needs a memory when you blog, and use Google?

I can just see me in about 20 years… Googling “when is my wife’s birthday? Or “who are these 25-year-old kids that keep asking me for money? Why am I locked in a room with a bunch of other YouTubers wearing a tight white sweater with the sleeves tied around my back? Where did I put my medicine? Where are my glasses”

Google can tell you where your glasses are.... on your head

Importing PC .mov Video Files Into Mac iMovie (without audio and video missing)

It’s the age old problem. You import an MPEG, Quicktime (.mov) or AVI into iMovie, and get a video with no audio. Or the dreaded white screen with working audio. That, of course, plunges you into countless hours of Google searches, flings you into the black hole of forum & help sites, and ultimately convinces you to buy several $20 downloads that don’t work. Then you finally figure it out, but the next time you forget what you did.

Today, after spending $100 on Flip4Mac’s WMV and upgrading to Quicktime Pro, I found the solution in free software from Squared 5. It’s called the MPEG Streamclip. It also allows you to rip videos from YouTube and other video sites (see picture), and save them in a variety of ways.

When I do collaboration videos, I’m often sending large files (using free Pando software or YouSendIt), and the video files usually work fine.

streamclip to convert video files between mac and PCBut sometimes video files present problems because they are muxed (the audio and video are mixed). The odd part is that the clips sometimes play fine on Quicktime but won’t import into iMovie. That’s because iMovie doesn’t support muxed files. So you need to demux the puppies.

First, download and launch MPEG Streamclip, and then open your problem video file. Next, select “File>Demux>Demux to M2V and AIFF.” This may give you a strange video file that still won’t open in Quicktime or iMovie. But at least you can import the audio portion, since AIFF exports separately, and imports as audio to iMovie without problems. To patch up this “Grant Giggles” video built from ancient .mov files, I had to import the videos as Quicktime .mov files, then import the audio separately as AIFFs (which I created in Streamclip). I next locked the audio and video using Apple-L (a nice trick Charles Trippy taught me).

This may not solve all problems because the file extensions “.mov and .mpeg” can be deceiving. There are lots of different CODECs (ways to code them), and some versions are Mac friendly and others aren’t.

Still, Streamclip is free (thanks, guys) and has a lot of different import and export/convert options that I would have thought would come with Quicktime Professional or Flip4Mac’s WMV professional studio (and I have no idea what I just payed $100 for, since WMV can’t solve this, and I’m not quite sure what it does otherwise).

Here’s another site with a buttload of information about file conversions.

Got any better tips for solving PC/Mac or Mac/PC conversion problems? Please comment below!

Addition December 19: Thanks ChristopherMast for pointing out iSquint. If you’re on Mac and want an easy way to rip videos from the web, try Tasty Apps.  Marquis- this is for demuxing your own clips if they’re old (like these, which I captured via MPEG on my digital camera). Also- sometimes you lose a video and have to go rescue it from Revver or something. And finally, when I make videos and want to show a highlight of someone else (usually ask permission if I’m not sure they’ll say yes).